How to Hang Acrylic Signs with Standoffs
Updated October 2026. By the end of this guide, you'll know how to mount a 3mm acrylic sign securely and evenly using wall standoffs. Before you start, have your sign, standoff hardware, a pencil, level, tape measure, and a drill with the correct bit for your wall type on hand. Whether you're hanging a lobby sign, a directory, or a plaque in a Cypress office or a Katy storefront, the steps below will get the sign flat, level, and firmly attached.
Step 1: Decide if Standoffs Are the Right Mounting Method
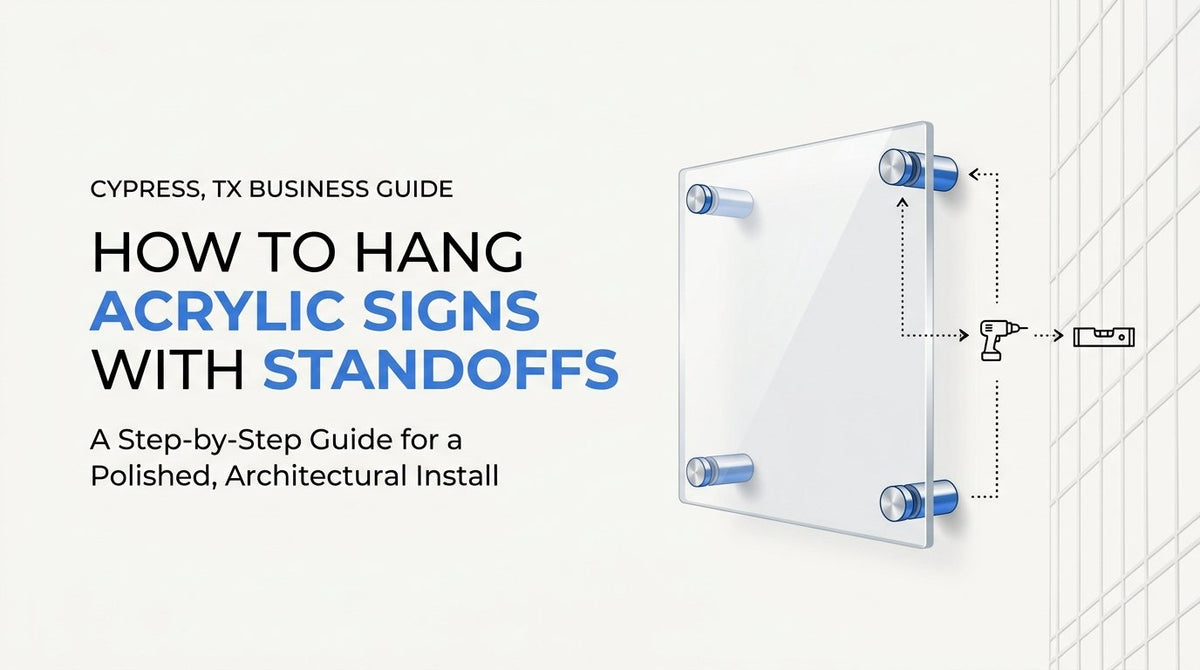
Standoffs are the barrel-and-cap hardware that holds an acrylic sign a small distance off the wall, creating a raised, dimensional look. They're the right call for signs larger than roughly 12x18 inches, or for any thicker or heavier piece of acrylic where double-sided tape starts to struggle over time. If you've ever seen a sign slowly peel away from a wall months after installation, tape that couldn't handle the long-term weight load was usually the culprit.
Beyond weight, standoffs also change the visual effect of the sign. Because the panel sits off the wall with visible hardware at each corner, standoffs read as more architectural and polished, which is why they're the go-to choice for lobby signage, wayfinding plaques, donor walls, and directories. If your sign is meant to make a statement in a reception area or hallway, the shadow gap standoffs create adds a subtle depth similar to the dimensional effect seen in acrylic 3D business signs.
Double-sided mounting tape still has its place. For lightweight acrylic on smooth, non-porous surfaces like painted drywall, laminate, or finished wood, high-bond tape gives you a clean look with no visible hardware and no drilling. It's a good fit for smaller signs, temporary installs, or situations where you want the sign to appear seamless against the wall. The tradeoff is holding power: tape depends heavily on surface prep and won't perform as well on textured walls, brick, or anything the sign will need to survive for years without maintenance.
If you're weighing both options for a sign you haven't ordered yet, it's worth deciding on mounting method before production, since some acrylic signs are pre-drilled to match standoff hardware. Browse the custom acrylic signs collection to see options that ship ready for standoff mounting.
Step 2: Check Your Wall Type Before Drilling
The wall surface determines almost everything about how you'll install the standoffs, so confirm this before you mark a single hole.
- Drywall: Standard drywall has no real load-bearing strength on its own, so each standoff needs a plastic or toggle anchor behind it to support the sign's weight. Toggle anchors are worth the extra step for anything heavier than a small plaque.
- Brick and masonry: You'll need a masonry drill bit and concrete anchors rated for the weight of your sign. If the brick is painted, test your drill in an inconspicuous spot first. Painted brick can chip or flake differently than bare brick, and you don't want that discovery on your marked mounting point.
- Glass and tile: Drilling isn't an option here, so use an adhesive-based standoff kit specifically rated for glass or tile. These rely on industrial adhesive pads rather than mechanical anchors, so surface cleanliness before application matters more than usual.
- Painted drywall or plaster: These surfaces can chip around the drill entry point. Place a small piece of painter's tape over your mark before drilling to help keep the paint edge clean, and back the drill out slowly once you feel it break through.
If you're not sure what's behind the surface, a stud finder can help confirm whether you're dealing with drywall over studs, solid masonry, or something else entirely. Getting this identification right up front saves you from stripped anchors or a sign that shifts within the first few weeks, a lesson that applies just as much to lighter-weight options like foam board signs mounted with different hardware.
Step 3: Mark and Space Your Mounting Points
Hold the sign against the wall in its intended position, or trace its outline with painter's tape so you can set it aside while you work. Mark each standoff center at least 1 to 2 inches in from every corner. Placing standoffs too close to the edge weakens the acrylic around the hole and increases the risk of cracking under stress.
Before you mark anything permanently, run a level across the top edge of the sign's outline. This matters more than it seems: on signs wider than 24 inches, even a slight tilt becomes obvious once the sign is hanging and catching light at an angle. A level line here saves you from redrilling later.
If your sign uses more than two standoffs, work from the center point outward rather than measuring corner to corner. Find the horizontal and vertical center of the sign, mark it lightly, then measure equal distances left and right (and up and down, if applicable) to each standoff location. This symmetrical approach keeps spacing visually even, which is especially noticeable on directories or multi-line signs where uneven gaps between hardware draw the eye, much like the alignment precision needed for trade show displays.
Double-check every mark against the tape measure before drilling. It's a quick step, but it's the one that prevents the most common standoff mounting mistake: a sign that's technically level but visibly off-center on the wall.
Step 4: Install the Wall-Side Standoff Barrels
With your marks confirmed, drill pilot holes sized to match your anchor type, not the screw itself. Insert each anchor so it sits flush with the wall surface. A protruding anchor will keep the standoff barrel from seating properly and can throw off your spacing.
Thread each standoff barrel onto its anchor by hand until it's snug against the wall. Resist the urge to speed this up with a drill or driver. Hand-threading gives you the control to feel when the barrel is secure without overtightening.
As you install each barrel, hold a small level against it before moving to the next one. Barrels that lean even slightly will translate into a noticeably crooked sign once the acrylic panel is resting on top of them, since the panel follows whatever angle the hardware sets. It's much easier to correct a barrel now than to fight with a mounted sign later, an approach worth remembering if you're also exploring immersive 3D brand activations for a larger space.
Be careful not to overtighten into drywall anchors specifically. Plastic anchors can strip out under excess torque, and once that happens, the anchor loses its grip on the drywall and needs to be replaced with a larger one. If a barrel feels like it's spinning without tightening, back out and swap in a slightly larger anchor rather than forcing it.
Step 5: Mount the Acrylic Panel and Secure the Caps
If you ordered a sign designed for standoff mounting, the acrylic panel arrives pre-drilled with holes sized to match your hardware, which takes the guesswork out of this step. Lift the sign carefully (a second set of hands helps on anything larger than a foot or two across) and align the holes over the installed barrels, letting the panel rest against them.
Once the sign is resting on the barrels, thread the front standoff caps on by hand. Work in a pattern rather than fully tightening one cap before moving to the next: snug the top two partway, then the bottom two, then go back and add another quarter turn to each in the same rotating order. This alternating approach keeps pressure even across the panel as you tighten, rather than pulling one corner tight while the others stay loose.
The most common mistake at this stage is overtightening the caps in an attempt to make the sign feel rock solid. Acrylic is more brittle than it looks, and clamping it too hard against the wall concentrates stress right around the mounting holes. Over weeks or months, that stress can develop into hairline cracks radiating from the hole, especially in Texas heat when the panel expands and contracts slightly with temperature, similar to material stress covered in our guide on eco-friendly sign materials in Houston. Snug is the goal, not crushed. Leave a whisper of clearance between the cap and the acrylic surface so the panel can sit naturally without being pinched.
Once all caps are on, give the sign a gentle push at each corner. It should feel stable with no wobble or shifting, but you shouldn't need to strain against the caps to get there. If one corner still moves, it usually means that particular barrel wasn't level or its anchor wasn't fully seated, so it's worth backing out that one cap and rechecking before finishing the rest.
Step 6: Final Check, Care, and When to Call a Pro
Step back and recheck the sign with your level one more time, since even a careful install can shift slightly while you're tightening the final caps. Wipe the acrylic down with a microfiber cloth and a mild soap and water solution to remove fingerprints from handling. Avoid ammonia-based glass cleaners: they can cause acrylic to cloud or craze over time, which dulls the finish permanently.
If you ever need to remove or reposition the sign, loosen each cap evenly in the same rotating pattern you used to tighten them, and have a hand supporting the panel's weight before the last threads release. Acrylic panels are lighter than glass, but an unsupported sign coming free unexpectedly can still crack on impact.
Some installs are better left to a professional, particularly large-format lobby signage, multi-panel displays that need precise alignment across several feet of wall, or tricky surfaces like brick and glass where the margin for error is smaller. For customers in Cypress and the greater Houston area, JYS offers on-site installation for exactly these situations, so you can order the sign you want without worrying about the mounting logistics, an approach discussed further in our guide to choosing the right sign shop in Cypress.
If you're still deciding on a sign, the custom acrylic signs collection has ready-to-order options that ship with matched standoff hardware, sized and drilled to fit.
Confirming the Sign Reads Right in the Space
With the sign level, secure, and hardware snug, step back to a normal viewing distance and check it at eye level before calling the install finished. Lighting, foot traffic angle, and the surrounding wall can all change how a sign reads once it's actually in place, and small adjustments are far easier before you've walked away. A properly mounted acrylic sign should look intentional from every angle someone will actually see it from, not just up close while you're holding the drill.
If you'd rather have a production partner handle the details from design through mounting hardware, Experience JYS: Order Now.