Step and Repeat Backdrop Sizes: How to Choose the Right Size for Your Event
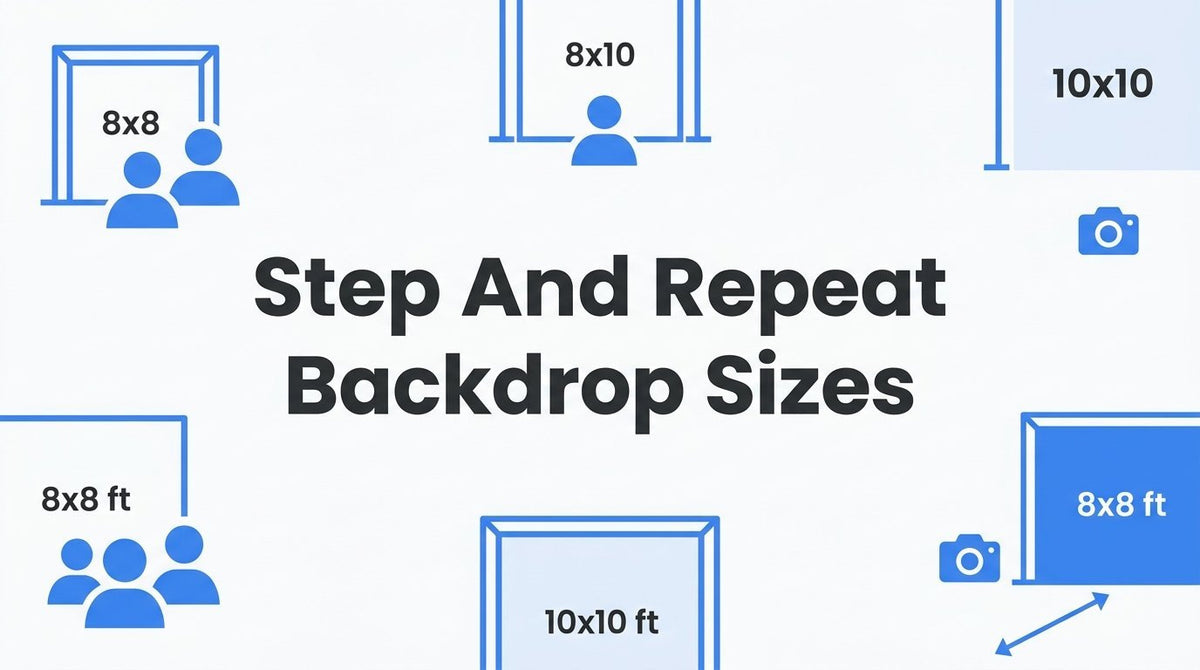
The most common step and repeat backdrop sizes are 8x8 ft, 8x10 ft, and 10x10 ft, but the right one depends on how many people will stand in front of it, how much wall you actually have, and where the photographer will stand. A backdrop that looks generous on a product page can feel tight once three people in formal wear step in front of it. One that looks modest can be a problem if it will not fit through the venue's service door.
Working through those three factors before you order saves rushed reprints and awkward photos. Below are the standard dimensions, a method for matching size to your guest count, a venue measuring checklist, and the artwork details that decide whether your logo pattern looks right at the size you choose.
Standard Step and Repeat Backdrop Sizes at a Glance
A step and repeat is a backdrop printed with a repeating pattern of logos, used for press lines, red carpet moments, and photo ops. The pattern means the brand shows up in nearly every frame, no matter where a guest stands. Most printers, JYS included, work from a handful of common formats:
- 8x8 ft: a square format that suits a single guest, a couple, or a small tabletop-style photo corner.
- 8x10 ft: eight feet wide by ten feet tall in most conventions, though you should confirm. It adds height, which helps with tall guests and vertical social media shots.
- 10x8 ft (wide): ten feet wide by eight feet tall. This is the better choice when you expect groups.
- 10x10 ft: a balanced, popular size for step and repeat banners at galas, openings, and corporate events.
- 8x20 ft: a long format for large walls, press lines with multiple stations, or stages where the backdrop doubles as a branded wall.
Confirm the orientation
Size is usually stated as width by height, but not every supplier or shopper follows that habit. An 8x10 and a 10x8 are very different products in practice, so write out "8 ft wide by 10 ft tall" on your order rather than relying on the shorthand.
Set sizes versus custom sizes
Pop-up fabric frames and straight or curved tension displays are generally made in set sizes, because the frame hardware is built to a fixed span. Printed vinyl banners are more flexible and can usually be made to custom dimensions, which helps when you have an odd wall or a specific ceiling limit. Confirm what is currently available for the frame type you want, and see our backdrop size and pricing buyer's guide for more on how dimensions affect cost.
Quick comparison
- 8x8 ft: one guest or a couple, with limited elbow room.
- 8x10 ft: a couple or a small group of up to three, with extra height.
- 10x8 ft and 10x10 ft: small groups of four or more, or a steady flow of guests.
- 8x20 ft: a full press line, team photos, or a venue wall that needs to look finished.
Matching Backdrop Size to the Number of People in the Photo
A workable rule of thumb: one person needs roughly 4 to 5 feet of visible width. That is not body width alone. It includes space on either side so the photo does not crop awkwardly and the logos read as a backdrop instead of a sliver behind someone's shoulders. Couples and small groups need more, and each additional person adds to the span.
In practice, an 8 ft wide backdrop suits one to three people. Once you expect groups of four or more, move to 10 ft wide or beyond. A wider format also lets guests shift around without stepping off the printed area.
Consider the type of event
The photo style matters as much as the headcount. A gala arrival is typically a couple or a pair of friends posing for a few seconds, so an 8x8 or 8x10 works well. A ribbon cutting is different: officials, owners, and staff line up shoulder to shoulder, often with oversized scissors and a banner in front. That setup needs a wide format, and 10 ft is a sensible minimum. For a team or graduating class, the 8x20 starts to make sense. If you are still gathering ideas for the photo area itself, these photo booth backdrop ideas for brands can help you plan the layout.
Why width gets underestimated
Shoppers often picture the backdrop empty. In use, guests stand in front of it, and their bodies cover a large part of the lower area. A pattern that seems to show eight logos across may show only five or six around a group. If you are between two sizes, choose the wider one, as long as the venue can handle it (the next section covers that).
Think also about who will stand there. Tall guests, wheelchair users, people holding awards or posters, and children all change the framing. Height is less of a constraint than width for most events, but an 8 ft tall backdrop can look short behind a group in heels or hats, so 10 ft tall is worth considering for formal events.
Measuring Your Venue: Ceiling Height, Wall Space, and Camera Distance
Bigger is not always better. A backdrop has to fit the room, the doors, and the photographer's working distance. Before you commit, take these measurements:
- Wall width: the usable stretch, excluding doors, pillars, outlets, and signage that cannot move.
- Ceiling height: the lowest point in the area, including lighting rigs, sprinkler heads, and drop ceilings. Add clearance above the top of the frame.
- Floor clearance: frames have feet or base plates that extend forward and sideways. A frame that is 10 ft wide can need a footprint that is a few inches wider or deeper than the graphic.
- Camera distance: photographers usually need to stand back 6 to 10 ft to capture a group and the backdrop together. Check this against your actual camera and lens, since a wide lens can work in less space and a longer lens needs more.
Leave room for the line, too. If guests queue to take photos, you need space for a waiting area, a path for foot traffic, and a spot where the line will not walk through someone's shot.
Load-in details people forget
Measure the load-in route, not only the display location. Check doorway widths, elevator interior dimensions, and any tight corners. Frames, carrying cases, and rolled banners all have lengths. A telescoping stand may collapse small, but a pop-up frame in its case can still be several feet long. Ask your supplier for case dimensions before the event.
Ask about hanging rules
Many venues prohibit tape, adhesives, and nails on walls, and some restrict rigging from ceilings or require approved vendors for installation. If you are working with a hotel ballroom, convention center, or a school gym, call ahead. A freestanding frame avoids most of these problems, which is why it is the default for most step and repeat setups. For outdoor venues, our guide to outdoor event backdrops in Houston covers wind, weight, and stability.
If your event is local, around Cypress, Katy, or Tomball, a quick site visit can resolve these questions in minutes. Photos of the wall with a tape measure in the shot also help a printer recommend a size.
Frame Types and Materials That Affect Your Final Size
The structure you choose sets the maximum width and height, and the print material affects how the backdrop looks on camera.
Frame types
- Telescoping stands with a banner: the adjustable crossbar and uprights let you set width and height within a range. They are light, easy to transport, and quick to assemble, but you are limited to the maximum span of the rails.
- Fabric pop-up frames: a collapsible frame holds a tension fabric graphic. These are wrinkle-resistant, reusable, and a good fit when the same backdrop will appear at several events. Sizes are generally fixed, so choose the dimension carefully.
- Straight or curved tension displays: similar in concept, with a curved option that adds depth and works well for trade show-style presentations.
Vinyl versus fabric
Tension fabric is a stretched textile print on a frame. A vinyl banner is a printed sheet, usually hung from a stand or grommeted to a frame. Vinyl is economical and works well for one-time events, and it can be made in custom sizes. Fabric costs more up front, but it hangs smoother, stays flatter, and can be reused many times. For a closer look at how material choices change the price, read standard vs. premium custom backdrop pricing.
Why finish matters in photos
Step and repeat photography almost always involves flash. A glossy surface reflects it, creating hot spots that wash out logos and appear as bright patches in photos. A matte finish scatters light and keeps the pattern readable from any angle. This is the main reason fabric and matte vinyl are favored for press walls, and it is worth asking about when you order. Ask JYS which materials and finishes are currently offered for your frame type.
Wrinkles and seams show up on camera as well. Ripples in a vinyl banner catch light and distract from the logos, so tension and hardware quality matter as much as the print itself.
Preparing Artwork So Your Logo Pattern Looks Right at Any Size
A step and repeat pattern is usually staggered, like bricks, so that no gap shows behind guests no matter where they stand. The same logo file can look very different depending on how large each logo is and how tightly they are spaced.
Logo size and spacing
Too few repeats look sparse and let the background dominate. Too many look cluttered and make individual logos hard to recognize. A typical layout shows several rows across the width of the banner. For an 8 ft wide backdrop, that often means logos in the range of a foot or so wide, with a margin around each. Your printer can mock up a few layouts so you can compare options before approving the proof.
File requirements
Supply logos as vector files, such as AI, EPS, or PDF. A vector file is built from shapes and paths, so it scales to any size without losing sharpness. A low-resolution PNG or JPG pulled from a website will look blurry or pixelated at backdrop size, especially when repeated dozens of times. If you are unsure which format to send, this guide to artwork formats for custom signs explains the options. Also confirm two print terms with the printer:
- Bleed: extra artwork that extends past the trim edge so no white shows after cutting or finishing.
- Safe area: the inner zone where logos and text should stay so hems, grommets, or frame edges do not cover them.
Design for the camera
Choose high-contrast logo colors against the background. Light logos on a light backdrop disappear in photos and on phone screens, and social media compresses images further. If your brand colors are low contrast, use a reversed version of the logo or a darker background.
Finally, keep important sponsor logos out of the bottom portion of the backdrop. Guests' legs and bodies cover that area. Place primary sponsors in the upper and middle rows, where they stay visible in nearly every photo.
Ordering Your Step and Repeat Backdrop in Cypress and Beyond
A smooth order starts with a few details in hand:
- The size you want, written as width by height
- The logos to include and how many sponsors or brands will appear
- The event date and any setup deadline
- The delivery or pickup location
JYS Sign & Print Co. offers design help if your artwork needs cleanup or a pattern layout, and the team can set up the repeat for you. Orders can be picked up locally in Cypress, shipped nationwide, and, for events in the Cypress and Houston areas, installed on site. Availability varies by project, so confirm what applies to yours.
Plan for proofing and timing
Build in time to review a proof. It is the last chance to catch a misspelled sponsor name, a wrong orientation, or a logo that sits too low. Confirm turnaround at the time of ordering rather than assuming, because timing depends on materials, quantity, and current workload. For broader planning help, see our rundown of event signage in Cypress, TX.
Think beyond one event
If the backdrop will travel, consider a carrying case and spare hardware, such as feet, clips, or extra rails. Replacing a single bent part is much easier than rebuilding a display the night before an event. Reusable fabric frames in particular are worth protecting, and a reusable setup like our reusable coroplast backdrop stands can stretch your budget across multiple events.
Let Your Guest Count and Venue Choose the Size
The right size follows three things: how many people will stand in the photo, what your venue can physically hold, and how your photographer will shoot. Start with the guest count, check it against your wall, ceiling, and load-in measurements, and then choose a frame and finish that photograph well.
If you are still deciding between sizes, send JYS your event details, including the date, venue, expected groups, and any measurements you have. We will recommend a size and provide a quote. Experience JYS: Order Now